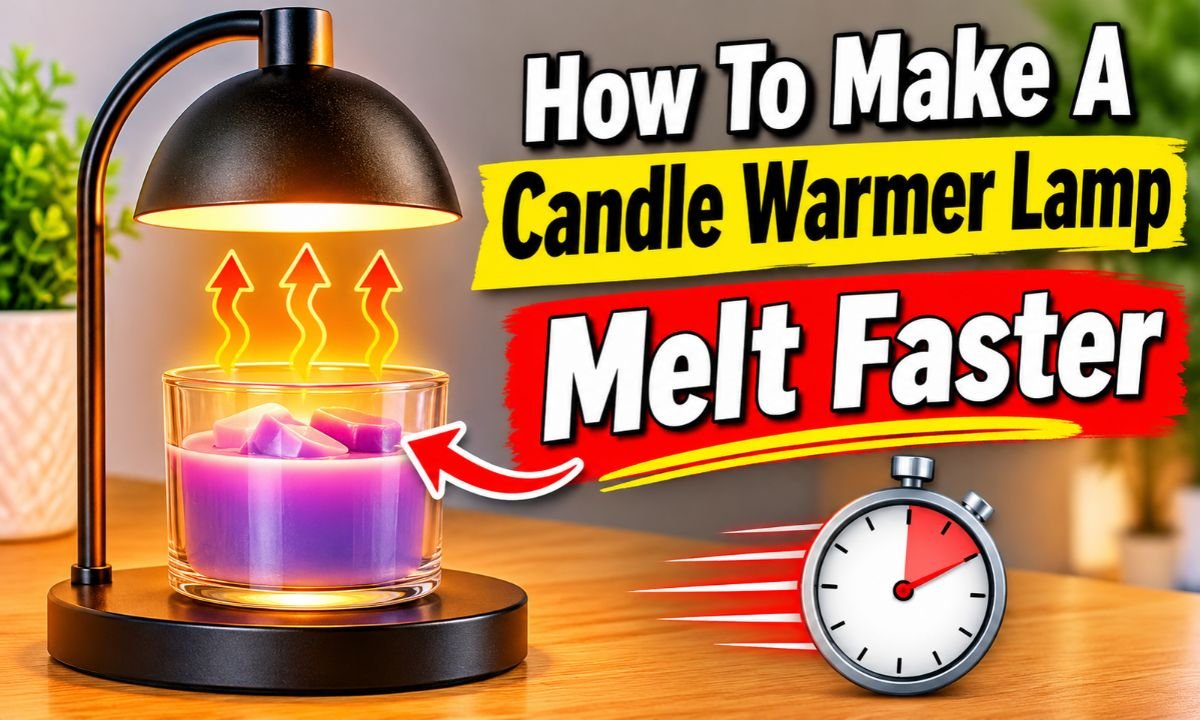
To make a candle warmer lamp melt wax faster, increase its brightness, lower the lamp head to a safe distance, center the candle under the bulb, and use the correct replacement bulb.
A candle warmer lamp can make a cozy addition to an American home. You might use one in a living room, bedroom, home office, or dining area. It warms scented candle wax without lighting the wick, which makes it a handy option when you want fragrance without an open flame. However, waiting for the wax to melt can feel frustrating when the lamp seems slow.
The good news is that a few simple adjustments can help. The distance between the bulb and the wax, the brightness setting, the candle size, and the type of bulb all affect how quickly the surface warms. You do not need to force extra heat into the candle or modify the lamp. Start with the settings your manufacturer provides and make small, safe changes.
A candle warmer lamp heats wax from above. It does not need to melt the entire candle to release its fragrance. A thin pool of liquid wax forms on the surface as the bulb warms it. This guide explains how to speed up that process, how to find the right settings, and what to check when your candle still melts slowly.
Source: www.pinterest.com
Why Does A Candle Warmer Lamp Melt Wax Slowly?
A candle warmer lamp may melt wax slowly because the bulb sits too far from the candle, the brightness is too low, or the candle contains a large amount of wax. A weak or incorrect bulb can also affect performance. Before changing anything, it helps to understand how the lamp works.
Most candle warmer lamps use a focused halogen bulb above the candle. The bulb sends heat toward the top of the wax. As the surface warms, the solid wax softens and becomes liquid. The fragrance oils in the warmed wax can then release their scent into the room.
Unlike a traditional candle warmer plate, a lamp warms the candle from the top down. This means the top layer can melt while most of the wax below stays solid. That is normal and does not mean the lamp is failing.
The amount of time needed varies. Candle Warmers Etc. explains that melting can take anywhere from a few minutes to an hour or more, depending on the warmer and candle size. There is no single melting time that applies to every lamp.
Source: easyhandicrafts.com
Bulb is too far away
A larger gap between the bulb and wax can reduce the heat reaching the candle surface.
Brightness is too low
A dimmer setting may provide less heat, so the wax takes longer to soften.
Candle is too large
A wide or deep jar may need more time to develop a melted surface layer.
Candle is not centered
If the jar sits outside the bulb’s focused heating area, the wax may warm unevenly.
Bulb is damaged or incorrect
An aging, loose, or incompatible bulb may not deliver the intended performance.
Does The Whole Candle Need To Melt?
No. A candle warmer lamp is designed to warm the surface of the wax. You do not need to turn the entire candle into liquid to enjoy its fragrance. A melted layer across the top is usually enough to show that the warmer is doing its job.
Trying to melt the whole jar by using excessive heat can waste fragrance and create unnecessary risks. Focus on a properly warmed surface rather than making all the wax liquid.
1. Increase The Brightness Setting
Increasing the brightness is one of the easiest ways to help a candle warmer lamp melt wax faster. If your lamp has a built-in dimmer, the higher setting may allow the bulb to provide more heat. This can help the wax soften sooner.
Start by checking the controls on your lamp. Some models have simple low, medium, and high settings. Others offer several brightness levels or a continuous dimmer. Choose a higher setting within the manufacturer’s instructions and watch how the wax responds.
Do not assume that every lamp has the same controls. Some products use a fixed-output bulb, while others allow heat adjustment through the dimmer. Read the manual before trying to change the settings.
If the wax begins melting evenly, you may not need to keep the lamp at its highest setting. Lower the brightness when you have enough fragrance or when the surface has warmed to your preferred level.
Source: lampinsider.com
Check the dimmer
Find the brightness control on the lamp base, cord, or touch panel.
Increase gradually
Move up one setting at a time instead of making several changes at once.
Watch the wax
Look for a smooth, softening surface and an even melt around the center.
Adjust when needed
Reduce the setting if the candle becomes excessively hot or the fragrance becomes too strong.
Does Higher Brightness Always Mean Faster Melting?
Not necessarily. The result depends on the bulb, dimmer design, and lamp construction. A higher setting may increase the heat delivered to the wax, but it cannot correct a faulty bulb or an unsuitable candle position.
It is also worth remembering that brighter light does not always mean a matching increase in heating power. Follow the controls and instructions for your exact model instead of judging heat by appearance alone.
2. Lower The Adjustable Lamp Head
If your candle warmer lamp has an adjustable arm, changing its height can improve how efficiently it warms the wax. A bulb that sits too high may spread its heat over a wider area, reducing the amount that reaches the candle surface.
Lowering the head slightly can bring the bulb closer to the wax. This may help the candle develop a melted surface sooner. However, the lowest possible position is not automatically the best position.
Every lamp has a safe operating range. The shade, bulb, jar, and adjustment mechanism are designed to work together. Moving the bulb too close can cause excessive heating, uneven melting, or damage to nearby parts.
Check the manual for the recommended clearance. If the manufacturer gives a minimum distance, never go below it. If the lamp does not have adjustable height, do not bend its arm or alter the structure to bring the bulb closer.
Source: amazon.com
Check the adjustment knob
Find the screw or knob that controls the lamp arm’s height.
Switch off the lamp
Allow the bulb and surrounding parts to cool before making adjustments unless the manual specifically provides another safe method.
Set the correct clearance
Position the head according to the minimum and maximum distances listed by the manufacturer.
Secure the arm
Tighten the adjustment knob so the lamp head cannot move or drop during use.
Check the result
Turn the lamp on and observe whether the wax warms more evenly.
How Far Should The Bulb Be From The Candle?
There is no universal distance for every candle warmer lamp. Some models are designed to work with a small gap, while others need more clearance because of their shade and bulb arrangement.
A measurement listed in another brand’s manual should not replace the instructions for your own lamp. Check the product manual or contact the manufacturer if the recommended distance is unclear.
The main goal is to direct heat toward the wax without placing the bulb too close to the jar, shade, or other parts.
What If The Lamp Head Cannot Be Adjusted?
Keep the lamp in its original position. Check whether the candle is the correct height for the warmer and whether the bulb is working as intended. A fixed-height lamp may simply be designed for a particular range of jar sizes.
Do not place books, loose objects, or unstable platforms under the candle to change its height. If your jar does not fit the lamp, use a compatible candle or a warmer designed for that size.
3. Place The Candle Directly Under The Bulb
Proper placement helps a candle warmer lamp deliver heat to the right area. If the candle sits too far to one side, the bulb may warm only part of the wax. This can make the melting process look slow or uneven.
Move the candle toward the center of the base so its wax surface sits directly beneath the bulb. Make sure the jar is stable and does not touch the lamp shade or other hot components.
A centered candle can develop a more even melted layer. This is especially useful for wide jars because their surface area may extend beyond the hottest part of the bulb’s focused beam.
Use a flat, stable, heat-resistant surface for the lamp. Avoid placing it near curtains, paper, decorations, or anything that could fall against the bulb or shade.
Source: amazon.com
Center the jar
Place the candle in the middle of the warmer’s base.
Check the bulb position
Make sure the bulb points toward the wax surface rather than the edge of the jar.
Keep the jar stable
Use a level base and avoid loose objects beneath the candle.
Allow enough space
Keep the jar away from the shade and follow the lamp’s clearance instructions.
Why Does One Side Melt Faster Than The Other?
Uneven melting can happen when the candle is not centered under the bulb. A wide jar, an angled lamp head, or a bulb with a narrow heating beam can also affect the result.
Switch the lamp off and let it cool before repositioning the candle or checking the head alignment. If the uneven heating continues, consult the manual for the correct setup.
4. Check Whether The Bulb Is The Correct Type
The bulb plays a major role in how quickly a candle warmer lamp melts wax. Many popular models use focused halogen bulbs because they direct heat toward the candle surface. However, bulb type, shape, wattage, and beam design vary by product.
If your candle has stopped melting as quickly as it once did, inspect the bulb after switching off and allowing the lamp to cool completely. Look for visible damage, a loose connection, or signs that the bulb has reached the end of its service life.
A replacement bulb must match the manufacturer’s requirements. For example, some models use a 50-watt GU10 halogen bulb, while other lamps require different bulbs. The fact that a bulb fits into the socket does not prove that it is compatible.
Never install a higher-wattage bulb to force faster melting. An oversized bulb can produce more heat than the lamp was designed to handle. It may damage the socket, wiring, shade, or other components and create a fire risk.
Source: storage.googleapis.com
Read the bulb label
Check the model number, bulb base, voltage, and maximum wattage listed in the manual.
Look for visible damage
Check for cracks, dark marks, or other signs of bulb failure after it has cooled.
Check the connection
If the bulb seems loose, follow the manual’s instructions for checking and reseating it.
Use a compatible replacement
Choose the exact bulb specification approved for your lamp.
Can You Use A Higher-Wattage Bulb?
No. Do not exceed the wattage approved for your candle warmer lamp. A higher-wattage bulb may appear to be an easy shortcut, but it can overheat the lamp and create electrical or fire hazards.
For example, if your lamp specifies a maximum 50-watt bulb, do not replace it with a 75-watt bulb. Use the listed specification, even if a different bulb has the same base.
Can You Use A Regular Household Bulb?
Usually, a regular household bulb is not a suitable replacement for a focused candle warmer bulb. The beam shape and heating characteristics may differ. Candle Warmers Etc. specifically explains that its lamp bulbs have a narrow beam designed to focus heat on the candle.
A bulb that produces plenty of visible light may still fail to warm the wax as intended. Always use the replacement type specified by the lamp manufacturer.
5. Choose A Candle That Fits Your Warmer
The candle itself can affect how quickly the wax melts. A small jar with a narrow surface may warm differently from a large, wide candle. A thick glass container can also affect how the candle fits beneath the lamp.
Check the maximum candle height and width allowed by your warmer. The jar should fit comfortably under the shade, with enough clearance around the bulb and other hot parts.
Wax composition can also influence the way a candle softens. Different candle blends may have different melting characteristics. Soy, paraffin, beeswax, and blended waxes should not be expected to behave in exactly the same way.
A candle that melts slowly is not automatically defective. It may simply need more time because of its size, wax blend, or container. Give it a reasonable warming session before deciding that something is wrong.
Source: amazon.ca
Check candle dimensions
Measure the jar height and width against the lamp’s stated limits.
Consider the surface area
A wider candle may take longer to develop a fully melted top layer.
Check the wax blend
Different wax formulas can respond differently to the same heating conditions.
Avoid damaged jars
Do not warm a candle in a cracked, chipped, or visibly damaged container.
Do Soy Candles Melt Slower Than Paraffin Candles?
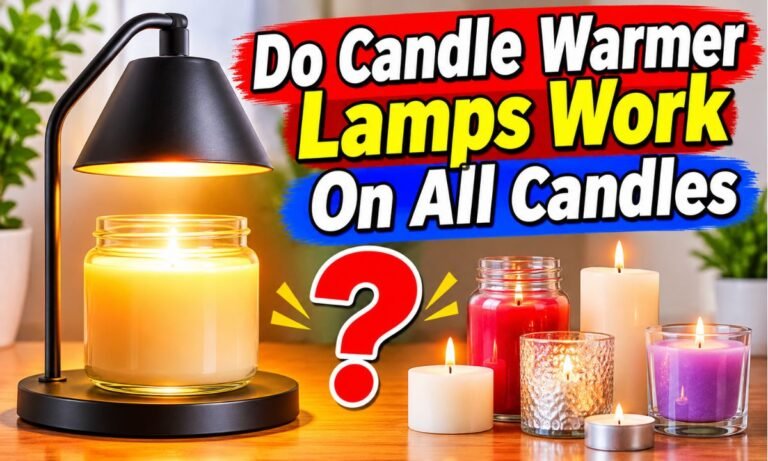
They can behave differently, but there is no simple rule that every soy candle melts more slowly than every paraffin candle. Wax formulation, fragrance load, container size, and heating conditions all affect the result.
Instead of choosing a candle based only on its wax name, check whether the container fits the lamp and whether the warmer is designed for that candle type.
Does A Larger Candle Need More Time?
Often, yes. A large jar may have a wider surface and a greater amount of wax to warm. However, a candle warmer lamp only needs to heat the upper layer, not the entire jar.
Use a compatible lamp and allow enough time for the top layer to soften. Avoid increasing the heat beyond the product’s approved settings just because the candle is large.
6. Clean And Maintain Your Candle Warmer Lamp
A clean candle warmer lamp can work more reliably than one with dust or debris around the bulb and shade. Dust, hair, and other particles can collect over time, especially if the lamp sits on a shelf or bedside table.
Before cleaning, switch off the lamp, unplug it, and allow every hot part to cool completely. Use a soft, dry cloth to remove dust from accessible surfaces. Follow the manufacturer’s instructions for cleaning the shade and other components.
Never spray cleaner directly onto the bulb or electrical parts. Do not wash the lamp under running water or use wet cloths near its socket. Moisture can damage electrical components.
Check the power cord and plug as part of routine care. If you see exposed wires, melted areas, damaged insulation, or unusual electrical smells, stop using the lamp. Contact the manufacturer or a qualified repair professional.
Source: easyhandicrafts.com
Remove dust
Clean accessible surfaces with a soft, dry cloth after the lamp has cooled.
Inspect the shade
Look for dirt or debris that may have collected around the bulb.
Check the cord
Look for cracks, cuts, fraying, or other signs of damage.
Secure loose parts
Follow the manual to check the arm and adjustment fittings.
Can Dust Make A Candle Warmer Lamp Work Poorly?
Dust can collect around the bulb and shade, and debris may interfere with normal operation. It is worth cleaning the lamp as part of regular maintenance, especially if you notice smoke, an unusual smell, or visible buildup.
If the lamp continues to flicker or behave strangely after cleaning, do not keep using it. A loose connection or damaged electrical part needs proper attention.
7. Give The Candle Enough Time To Warm Up
Sometimes, the best way to get faster results is to allow the warmer to operate for a reasonable period instead of changing several settings at once. A candle does not always form a visible pool of liquid wax immediately after the lamp turns on.
Start with the manufacturer’s recommended settings. Watch the wax during the first part of the session. If the surface begins to soften, the warmer is likely doing its job.
A large candle may need more time than a small one. The room temperature, wax blend, and distance from the bulb can also affect the result. Do not compare two different candles as though they should melt at exactly the same speed.
Once the surface has warmed, you can decide whether the fragrance level is suitable. There is no need to keep increasing the heat just to make the wax completely liquid.
Source: Ikea Hacker
Start with the correct setting
Use the brightness and height recommended in the manual.
Watch the surface
Look for softening or a small melted pool around the heated area.
Avoid constant adjustments
Change one setting at a time so you can identify what improves performance.
Stop when needed
Switch off the warmer when you have enough fragrance or when the recommended session ends.
8. Troubleshoot A Candle Warmer Lamp That Still Melts Slowly
If the wax still does not melt after adjusting the brightness and checking the candle position, look for a specific problem. A lamp that has always worked slowly may have a different issue from one that suddenly stops heating properly.
Start with simple checks. Confirm that the lamp is plugged in, the outlet works, and the bulb matches the manufacturer’s specification. If the lamp flickers, smells unusual, or has a damaged cord, stop using it rather than trying to increase the heat.
Do not open the lamp housing or attempt electrical repairs unless you are qualified and the manufacturer provides an approved repair procedure. Contact customer support if the problem continues.
Source: www.pinterest.com
The wax does not melt at all
Possible causes include a failed bulb, incorrect bulb type, faulty outlet, or electrical connection problem. Check the manual and inspect the lamp only after it has cooled.
Only a small spot melts
The candle may be off-center, the bulb may not cover the full surface, or the jar may be wider than the lamp’s effective heating area.
The bulb flickers
Switch off and unplug the lamp. Allow it to cool and check the bulb connection according to the manual. Stop using it if flickering continues.
The bulb glows but produces little heat
The bulb may be incompatible, damaged, or unsuitable for the lamp’s focused heating design.
The candle melts but has little fragrance
The wax may have released much of its fragrance during earlier warming sessions. More heat may not restore the lost scent.
The lamp makes a strange smell
Switch it off and unplug it if you notice a burning electrical smell, smoke, or unusual heat. Do not use it again until the cause has been checked.
Quick Troubleshooting Table
Use this table to match the problem with a sensible first check. Always follow your exact model’s instructions because lamp designs and bulb systems differ.
Slow melting
Check lamp height, brightness, candle position, and bulb compatibility.
Uneven melting
Center the candle and check the lamp head alignment.
No melting
Check the power source and bulb specification.
Weak fragrance
Check whether the candle’s top layer has lost its fragrance.
Overheating
Switch off the lamp and check for incorrect bulb use, poor clearance, or a fault.
9. Understand What A Faster Melt Means For Fragrance
Faster melting can help release fragrance sooner, but more heat is not always better. A candle warmer lamp releases fragrance by warming the wax. As the fragrance compounds evaporate, the scent can gradually become weaker.
If you keep the candle at a high setting for long periods, you may use up its fragrance more quickly. The wax can still look fresh even when much of its original scent has faded.
Candle Warmers Etc. explains that warming does not burn away the wax in the same way as lighting a wick. However, fragrance can still evaporate over repeated heating sessions. When the scent becomes weak, the melted top layer may no longer provide the same fragrance as fresh wax underneath.
For this reason, aim for a useful amount of warmth rather than the fastest possible melting. A moderate setting that gives you a pleasant scent may be better than running the lamp at maximum brightness for every session.
Source: amazon.com
Use only the heat you need
Choose a setting that produces enough fragrance without excessive heating.
Avoid unnecessarily long sessions
Turn the lamp off when you no longer need the fragrance.
Monitor scent strength
A melted surface with little fragrance may indicate that the top layer has lost much of its scent.
Replace or refresh the candle appropriately
Follow the candle and warmer manufacturer’s instructions when the fragrance becomes weak.
Can You Remove The Melted Wax To Get More Fragrance?
Some candle warmer manufacturers recommend removing the melted top layer when its fragrance fades. This can expose wax underneath that still contains fragrance. However, this approach depends on the candle and the manufacturer’s guidance.
Never pour hot wax into a sink or toilet. It can cool and harden inside plumbing. If the manufacturer recommends removing wax, let it cool to a manageable state and use a suitable heat-resistant container for disposal.
10. Candle Warmer Lamp Safety Tips You Should Never Ignore
A faster melting candle should never come at the cost of safety. Candle warmer lamps contain electrical parts and hot bulbs. The jar and melted wax can also become hot during use.
Place the lamp on a stable, level, heat-resistant surface. Keep it away from curtains, bedding, paper, clothing, and other materials that can catch fire. Make sure children and pets cannot knock it over or touch the hot components.
Do not light the candle while it is under the warmer lamp. The warmer is designed to heat the wax without a flame. Lighting the wick at the same time can create an unintended combination of heat sources.
Use the timer if your model has one, but do not treat it as permission to leave the appliance running without appropriate supervision. Turn off and unplug the lamp when it is not in use, following the manual.
Never touch the bulb, shade, or melted wax immediately after use. Let the lamp cool fully before changing a bulb, cleaning the unit, or moving the candle. If you notice smoke, a burning smell, damaged wiring, or unusual overheating, switch off the lamp and stop using it.
Source: amazon.com
Use the correct bulb
Never exceed the lamp’s approved wattage or use an unapproved replacement.
Keep flammable items away
Leave curtains, paper, clothes, bedding, and decorations clear of the hot lamp.
Protect children and pets
Place the warmer where it cannot be easily reached, pulled, or knocked over.
Do not use a damaged lamp
Stop using the unit if the cord, plug, socket, or housing shows signs of damage.
Allow proper cooling
Wait until all parts are cool before cleaning or replacing the bulb.
Follow the timer instructions
Use the automatic shut-off as an added control, not a substitute for safe supervision.
Can You Leave A Candle Warmer Lamp On Overnight?
It is best to switch off the lamp before going to sleep. An automatic timer can reduce the chance of extended operation, but it does not remove every electrical or fire risk.
A candle warmer lamp is also not useful when nobody is awake to enjoy the fragrance. Turning it off when you leave the room or finish using it is a sensible habit.
Can You Put Something Under The Candle To Raise It?
Do not use books, cardboard, plastic containers, loose coasters, or other makeshift supports to move a candle closer to the bulb. They may be unstable or unsuitable for heat exposure.
If your lamp cannot safely accommodate the jar, choose a compatible candle or a warmer designed for that size. Never compromise the manufacturer’s required clearances.
11. Best Settings For Different Candle Warmer Situations
The right setup depends on your lamp and candle. A small jar may warm quickly, while a wide candle may need more time. The following table offers a practical starting point for checking your setup, not a universal temperature or distance guide.
Always use the brightness range and clearance approved for your exact model. If your lamp has no dimmer or adjustable arm, leave those features unchanged and focus on correct placement and bulb compatibility.
Source: storage.googleapis.com
Small jar candle
Center the jar under the bulb and use a normal approved brightness setting. Check the surface after warming begins.
Large jar candle
Confirm that the lamp supports the jar’s dimensions and allow extra time for the wider surface.
Candle with weak fragrance
Check whether the wax has lost its fragrance before increasing the heat.
New candle warmer lamp
Follow the setup instructions and confirm that the supplied bulb is installed correctly.
Older candle warmer lamp
Inspect the bulb, cord, shade, and adjustment fittings for signs of wear.
A Simple Example Of A Better Setup
Imagine you have a wide scented candle on a bedside table. The lamp is adjustable, but the head sits high and the dimmer is on its lowest setting. The wax barely softens, even after the lamp has been on for a while.
First, switch off the lamp and allow it to cool. Check the candle dimensions and the manual’s clearance instructions. Center the jar, adjust the head within the approved range, and select a higher permitted brightness setting.
Turn the lamp on and observe the wax. If the surface begins to soften evenly, the adjustments are helping. If nothing changes, inspect the bulb specification and contact the manufacturer rather than trying a stronger bulb.
12. Research Findings And Important Reader Questions
The main advice across the product guidance reviewed for this article is consistent: candle warmer lamps use focused heat from above, and the correct bulb, candle position, brightness, and clearance affect how they operate.
Candle Warmers Etc. explains the top-down heating method and notes that melting time varies from minutes to an hour or more. Yankee Candle also describes adjustable height, brightness settings, and timers as features that help users control their warming experience.
Several product manuals reviewed for this topic identify excessive lamp height and low brightness as possible reasons for slow melting. They also warn users to use the specified bulb and allow hot components to cool before maintenance.
A useful distinction is that a faster melt does not prove that the candle will have a stronger or longer-lasting fragrance. Heating can release fragrance more quickly, but repeated warming can also use up the available scent. The best approach is to improve the setup without exceeding the lamp’s approved operating limits.
Source: www.pinterest.com
Observed topic: slow wax melting
Product troubleshooting guidance commonly addresses lamp height, dimmer settings, and bulb compatibility. This article explains how to check these factors without unsafe modifications.
Observed topic: weak fragrance
Manufacturer guidance discusses fragrance loss during repeated warming. The useful distinction is between wax that is not melting and wax that has already lost much of its scent.
Inferred next need: candle size compatibility
A reader trying to improve melting speed may also need to check jar dimensions and lamp clearance. Product specifications provide the relevant evidence.
Inferred next need: bulb replacement
A lamp that previously worked well may develop a bulb problem. The correct replacement specification is more useful than simply choosing a brighter bulb.
Inferred next need: safe operating time
Readers may wonder whether longer sessions are better. Timer features and manufacturer safety instructions help answer this question.
How This Guide Improves On Common Troubleshooting Advice
Basic candle warmer guides often tell readers to lower the lamp or increase brightness. Those steps can help, but they are incomplete without a clear warning about minimum clearance and approved bulb wattage.
This guide also separates slow melting from weak fragrance. These are different problems and need different solutions. A new bulb may help a faulty heating system, but it will not restore fragrance that has already evaporated.
The practical lesson is to identify the actual problem before changing settings. This reduces wasted effort and avoids unnecessary heat.
Frequently Asked Questions
Q
How Long Does A Candle Warmer Lamp Take To Melt Wax?
The time varies by lamp design, bulb, candle size, wax blend, and distance from the bulb. Some candles begin melting within minutes, while larger candles may need an hour or more to develop a noticeable melted surface.
Candle Warmers Etc. gives a range from a few minutes to an hour or more for its different warmer products. Follow your own lamp’s instructions rather than relying on a fixed time.
Q
Does Turning A Candle Warmer Lamp To High Make It Melt Faster?
It may. If your lamp has a dimmer, a higher approved setting can increase the heat reaching the wax. This can help the surface soften sooner.
However, always remain within the manufacturer’s operating instructions. Do not use a higher-wattage bulb or move the lamp head closer than the approved clearance.
Q
Can I Make My Candle Warmer Lamp Melt Faster With A Different Bulb?
Only replace the bulb with the exact compatible type specified by the manufacturer. Some lamps use focused GU10 halogen bulbs, while others use different designs.
A regular household bulb may not have the correct beam pattern or heating characteristics. Never install a bulb with a higher wattage than the lamp allows.
Q
Why Does My Candle Warmer Lamp Melt Only The Middle Of The Candle?
The candle may not be centered under the bulb, or the bulb’s focused heating area may cover only part of the wax surface. A wide jar can also take longer to warm evenly.
Switch off the lamp and allow it to cool before checking the candle position and lamp alignment. Keep the jar within the product’s size limits.
Q
Should I Remove The Melted Wax From My Candle Warmer?
You may need to remove the top layer if the candle has lost its fragrance. Some manufacturers recommend this because the melted surface can contain wax whose fragrance has already evaporated.
Follow the candle manufacturer’s instructions. Never pour hot wax into a sink or drain because it can harden inside the plumbing.
Q
Can I Use A Candle Warmer Lamp With Soy Candles?
Many jar candles, including some soy candles, can be used with compatible candle warmer lamps. However, the candle container and dimensions must fit the lamp’s design.
Check the candle and warmer instructions before use. Different wax blends may respond differently to heat, so melting speed can vary.
Q
Why Is My Candle Warmer Lamp Not Getting Hot Enough?
Possible reasons include a bulb that is wearing out, an incompatible replacement bulb, a low brightness setting, or a bulb that sits too far from the wax.
Check the power connection, bulb specification, and lamp setup after switching off and allowing the unit to cool. If the lamp still does not work correctly, contact the manufacturer.
Q
Can I Use A Candle Warmer Lamp Without A Dimmer?
Yes. A dimmer is a convenience feature, not a requirement. A fixed-output candle warmer can still warm compatible candles using its approved bulb.
For a lamp without adjustable brightness, focus on correct candle placement, bulb compatibility, and the manufacturer’s recommended setup.
Q
Is It Safe To Use A Candle Warmer Lamp At Maximum Brightness?
Use maximum brightness only if the manufacturer allows that setting and the lamp is correctly assembled. Keep the candle within the approved size range and maintain the required clearance.
If the lamp or candle becomes unusually hot, or you notice smoke or an electrical smell, switch it off and stop using it. Never exceed the lamp’s approved bulb wattage.
Q
Will A Candle Warmer Lamp Melt An Entire Candle?
A candle warmer lamp is designed to warm the wax from the top. It normally creates a melted surface layer rather than turning the entire jar into liquid wax.
That surface warming is enough to release fragrance. Trying to melt the whole candle by adding excessive heat is unnecessary and may create a safety problem.
✦ Wrapping Up
Conclusion
Making a candle warmer lamp melt faster usually comes down to a few simple things. Check the brightness setting, place the candle directly under the bulb, and adjust the lamp head within the manufacturer’s approved range. These steps can help the bulb warm the wax more effectively.
If the candle still melts slowly, check the bulb type, candle size, and power connection. A damaged or incompatible bulb may need attention, but never use a higher-wattage replacement to force faster results. The lamp was designed to work with specific parts and clearances.
Remember that the goal is to warm the wax surface and release its fragrance. You do not need to melt the entire candle or run the lamp at maximum power for long periods. A properly positioned candle and a compatible bulb are often more useful than extra heat.
Most importantly, keep safety in mind. Use a stable surface, keep flammable items away, follow the timer instructions, and let hot parts cool before touching them. With the correct setup, your candle warmer lamp can provide a pleasant fragrance without unnecessary adjustments.
💡 Key Takeaway
Start by centering your candle under the bulb, checking the approved brightness and lamp height, and confirming that the correct bulb is installed. Make one change at a time, watch the wax, and never exceed the manufacturer’s safety limits.